Month: September 2026

Interior Design Meets Rural Fencing Wire

Interior design often becomes more interesting when everyday materials are used in unexpected ways. Rural fencing wire is a good example. It was created for farms, livestock areas, gardens, and property boundaries, but its strong structure and simple appearance can also work inside a home. When used carefully, it can bring texture, contrast, and a rural character to modern interiors without making the space feel unfinished.

The appeal of rural fencing wire comes from its honesty. It is a practical material with a clear purpose. Unlike decorative products made to imitate an industrial or farmhouse look, fencing wire already has that character. Its metal grid can introduce a sense of structure while allowing light and visibility to pass through. This makes it useful for interiors that need separation without creating solid barriers.

Farmhouse interiors are an obvious match. Timber cabinets, warm neutral colours, stone surfaces, and simple fabrics can work well with galvanized wire. A wire panel inside a wooden cabinet door can replace glass and create a relaxed country feel. It can be used in kitchens, pantries, utility rooms, or entry areas where storage needs to remain practical.

Rural fencing wire can also suit industrial interiors. Exposed brick, concrete, dark metal, and reclaimed wood already share the same practical spirit. Wire panels can be added to shelving units, storage cabinets, or custom furniture to create visual detail. The material should not dominate the room. A small amount is often enough to connect different metal elements and make the design feel consistent.

Modern interiors can use fencing wire in a more controlled way. A clean timber frame with a simple wire grid can become a wall feature, room divider, or plant support. Against plain walls and simple furniture, the wire creates contrast without adding excessive decoration. Its open structure can keep a room feeling light and uncluttered.

One useful idea is a framed wire display board. A section of fencing wire can be fixed inside a wooden or metal frame and mounted on a wall. Photos, notes, postcards, small tools, or decorations can be attached with clips. This works well in home offices, kitchens, workshops, and creative rooms. It provides storage and display space while adding a handmade quality to the wall.

Another option is to use rural fencing wire as a backing for open shelves. The wire adds a visible pattern behind books, pottery, plants, or kitchen items. It can make simple shelving feel more detailed without reducing storage space. This approach works especially well when the shelves are made from natural or reclaimed timber.

Balancing Strength, Texture, and Comfort

Because fencing wire is hard and metallic, it needs to be balanced with softer interior materials. Timber is one of the best partners because it adds warmth. Oak, pine, reclaimed boards, and painted wood can all reduce the cold appearance of metal. The combination feels natural because wood and wire are commonly seen together in rural settings.

Textiles are also important. Rugs, curtains, cushions, upholstered chairs, and woven baskets can soften a room that includes metal features. If too many hard materials are used together, the space may feel cold or overly industrial. Interior design should create balance. Rural fencing wire should add character while the rest of the room provides comfort.

Colour can change how the wire feels. Galvanized wire has a silver finish that works well with white, grey, beige, natural wood, and muted green. Black coated wire gives a stronger and more modern look. It can work with darker cabinetry or industrial furniture. Weathered or rusted wire may suit rustic spaces, but it should be cleaned and sealed before indoor use to prevent stains and loose rust.

The size of the grid also affects the final appearance. Large openings create a bold, simple pattern. They can work well for room dividers, large wall panels, or plant supports. Smaller openings create more detail and may suit cabinet doors, small frames, or storage furniture. The scale should match both the size of the room and the purpose of the feature.

Lighting can make fencing wire more decorative. When light hits a grid from the side, it can cast patterns onto nearby walls. Warm lighting often works well because it softens the appearance of metal. Natural light can also highlight the difference between wire, timber, plants, and painted surfaces. This adds depth without requiring extra decoration.

Indoor plants are another strong match. A wire panel can act as a trellis for climbing plants, creating a living wall effect. The greenery softens the metal and strengthens the connection to rural landscapes. This idea can work in kitchens, sunrooms, covered patios, or bright living areas where plants receive enough light.

Rural fencing wire can also improve practical spaces. In a mudroom, it can support hooks, baskets, or small storage accessories. Combined with a bench and shelves, it can create an organised area for shoes, bags, coats, and outdoor items. In a workshop, the same material can provide flexible wall storage for lightweight tools and supplies.

Safety is essential in every interior application. Cut wire may have sharp ends, so edges should be trimmed, folded, capped, or enclosed inside a frame. Panels should be firmly fixed so they cannot move or bend unexpectedly. Areas used by children or pets require extra care. A design feature should always be safe to touch and easy to maintain.

Good interior design does not depend on expensive materials. It depends on how materials are selected, combined, and placed. Rural fencing wire shows how a simple agricultural product can take on a different role indoors. Used in cabinets, shelving, displays, dividers, storage, or plant features, it can add useful structure and authentic rural character. When balanced with wood, textiles, plants, and warm lighting, it becomes part of a comfortable interior rather than a rough outdoor material. It proves that practical materials can support attractive spaces when function, safety, proportion, and visual balance are considered together.
Posted by Ulysses Quinlan in Interior Design, Modern Interior Design

7 Fence Design Ideas That Complement Modern Sydney Properties

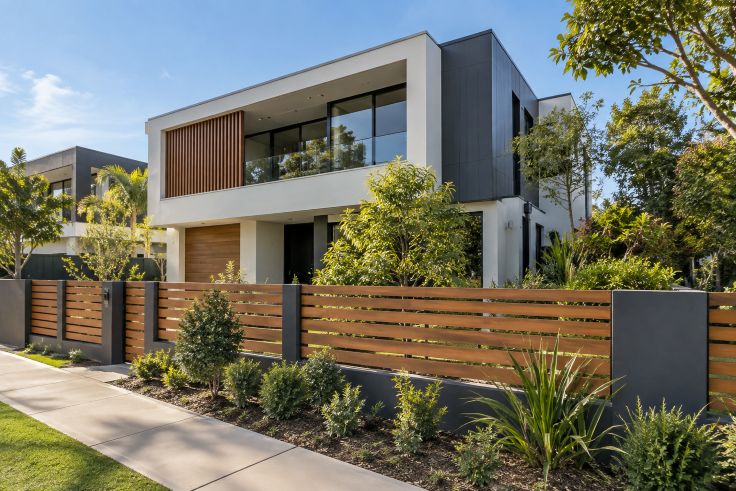
contemporary Sydney home

Fencing can influence privacy, security, airflow, street appeal, and the way a home connects with its outdoor spaces. It also needs to work within planning requirements. NSW Planning notes that some fences may qualify as exempt development when they meet the standards set under the NSW planning framework.

The challenge is finding a boundary treatment that performs these practical jobs without looking disconnected from the house. For owners of Sydney properties, that often means considering the architecture, surrounding landscape, privacy needs, and local conditions together. A fence that suits a coastal home may feel out of place beside a traditional facade, while a solid privacy fence may be unnecessary where openness is more important.

The solution is to treat fencing as part of the overall exterior design rather than as a separate feature. These seven ideas show how different approaches can work with a range of residential styles.

1. Choose Clean Horizontal Lines for Contemporary Homes

Modern homes often use simple forms, broad surfaces, and restrained colour palettes. Horizontal fencing can continue those lines into the front garden and create a visual connection between the building and its boundary.

Timber, aluminium, and composite-style finishes can all suit this approach. The key is restraint. Keep decorative details limited and consider repeating colours already found in window frames, roofing, garage doors, or exterior cladding.

Spacing also matters. A fully solid design provides greater screening, while gaps between boards create a lighter appearance and allow more air to move through the boundary.

2. Keep Coastal Fencing Light and Open

Homes near the coast often benefit from designs that feel open rather than visually heavy. Slim vertical battens, simple aluminium fencing, and pale finishes can complement coastal architecture without competing with landscaping or views.

Airflow is worth considering as well. YourHome, the Australian Government’s sustainable housing resource, explains that fences and landscaping can be positioned to direct beneficial breezes toward a home. This makes boundary design part of the broader response to local conditions rather than a purely decorative choice.

3. Give Traditional Homes a Simpler Update

A modern fence does not have to make an older property look contemporary. Traditional homes can work well with vertical pickets, restrained masonry elements, or metal fencing with straightforward proportions.

Instead of adding elaborate ornament, take cues from the house itself. Look at the spacing of veranda posts, window proportions, roof details, and existing materials. Repeating one or two of these visual elements can make a new fence feel more settled.

Colour can provide the modern update. A simple neutral finish can make a familiar fence profile look cleaner while preserving the character of the property.

4. Use Minimalist Fencing to Reduce Visual Clutter

Minimalist architecture works best when every exterior element has a clear purpose. A complicated boundary can weaken that effect.

Consider narrow battens, simple panels, concealed fixings, and gates that visually continue the fence line. Matching the fence with other exterior elements can also reduce the number of competing colours and materials.

Minimal does not mean ignoring practical requirements. Before settling on height and construction, check the site’s planning conditions. NSW Planning provides specific standards for fences that qualify as exempt development, including requirements that vary by location, zoning, materials, and site conditions.

5. Build Privacy Into the Design

Privacy is often a priority where outdoor entertaining areas, bedrooms, or living spaces sit close to neighbouring properties. Solid or closely spaced fencing can create useful screening, but taller and heavier designs should still relate to the scale of the house.

One option is to combine a solid lower section with a lighter upper section. Another is to use vertical battens with carefully chosen spacing. Both approaches can soften the visual weight of a large boundary.

Think about ventilation before creating a completely solid enclosure. YourHome highlights air movement as an important part of passive cooling and recommends considering fences and planting when planning breeze paths around a dwelling.

6. Make Pool Fencing Feel Connected to the Garden

Pool fencing has a strong practical role, but it does not need to feel separate from the surrounding landscape. A restrained design can help the pool, paving, planting, and house read as one outdoor space.

Transparent sections can preserve sightlines where appropriate, while slim metal fencing can provide a more defined edge. Material selection should respond to the architecture and outdoor finishes already present.

Safety requirements should come before appearance. Design choices around a pool need to satisfy the applicable NSW requirements, so decorative decisions should be made only after the required barrier configuration has been established.

7. Let Landscaping Share the Work

A fence does not have to provide all the visual screening on its own. Combining a simple boundary with trees, shrubs, grasses, or climbing plants can create a softer transition between the home and the street. This approach also helps connect the boundary with outdoor living spaces, where fencing, planting, paving, and seating areas can be planned as parts of the same overall design.

This approach can be especially effective when a tall solid fence would make a small front garden feel enclosed. YourHome notes that gardens and green plants can help cool the areas around homes through shade and evapotranspiration. It also recommends coordinating fences and planting so useful breezes are directed rather than unnecessarily blocked.

A Fence Should Belong to the Whole Property

Good fence design starts with more than choosing a material. The home’s architecture, street setting, privacy needs, landscaping, airflow, and planning rules all influence what will work.

Contemporary homes may suit crisp horizontal lines, while coastal settings often benefit from lighter boundaries. Traditional houses can retain familiar proportions, minimalist homes can reduce visual clutter, and landscaped properties can use planting to soften the boundary.

Taking these factors into account early makes it easier to create a fence that feels intentional. As residential design continues to place greater emphasis on connected indoor and outdoor spaces, boundaries can become a considered part of the overall property rather than an element added at the end.

Posted by Deacon Aureole in Home Architecture

A Step-by-Step Guide to Planning an Acoustic Feature Wall

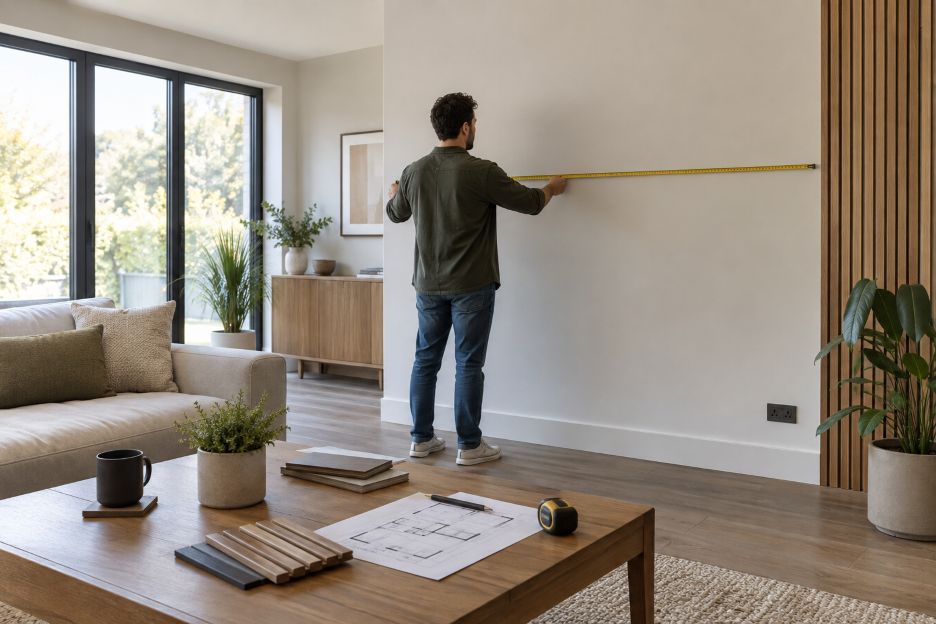
Measuring a Bright Living Room Wall

Hard, smooth surfaces reflect more sound than soft, porous materials, which can make a room feel lively or echo-prone. Guidance from the Occupational Safety and Health Administration explains that reflected sound can build up when it repeatedly bounces from hard walls, ceilings, and other surfaces. A feature wall can help address this issue, but its position, size, and materials need to be planned carefully.

The challenge is balancing appearance with acoustic performance. Decorative panels may create warmth and texture, yet their effect depends on their construction and placement. Products such as acoustic panels from QuietWalls can be considered as part of this type of interior plan. It is important, however, to understand the goal. Acoustic panels are mainly intended to manage reflections, echo, and reverberation within a room. They are different from soundproofing systems designed to limit sound transmission between spaces, a distinction also highlighted by the Acoustical Society of America.

A Step-by-Step Guide to Planning an Acoustic Feature Wall

A successful feature wall starts with the room rather than the panel. Before choosing colours or finishes, consider where reflections occur, how the room is used, and what must remain accessible after installation.

Step 1: Assess the Room’s Reflective Surfaces

Start by looking at the materials already in the room. Large windows, painted walls, hard flooring, glass tables, and other smooth finishes can contribute to reflected sound. Rooms containing several of these surfaces may have noticeable reverberation, particularly when they contain few curtains, rugs, upholstered pieces, or other absorptive materials.

The Acoustical Society of America notes that rooms with hard, sound-reflecting finishes tend to be more reverberant. Softer treatments, including acoustic wall panels and carpeting, can reduce reflected sound and improve speech intelligibility.

A simple listening test can provide an initial clue. Speak or clap from several points in the room and listen for lingering reflections. For spaces where acoustics are especially important, professional measurements provide more useful information than relying on perception alone.

Step 2: Choose the Right Wall

The largest empty wall is not automatically the best choice. Consider where people sit, talk, watch television, listen to music, or work. Sound-absorbing material is most useful when it can intercept reflections that would otherwise return to occupied areas.

Placement becomes particularly important in listening rooms. Acoustic design guidance from Arqen explains that treating early reflection points can reduce reflections reaching the listening position. The exact strategy will vary with the room, so the wall should be selected for both visual and acoustic reasons.

Step 3: Measure the Available Area

Measure the full width and height of the proposed feature wall. Then record anything that interrupts the surface. This may include doors, windows, switches, sockets, radiators, vents, televisions, shelving, and wall-mounted lights.

Do not assume that every centimetre needs to be covered. Partial coverage can create a deliberate architectural effect while leaving important fixtures accessible. Accurate measurements also help prevent awkward narrow sections at the edges.

Sketch the wall to scale before ordering materials. Mark the centre line and the positions of permanent fittings. This makes it easier to compare symmetrical, asymmetrical, and full-height layouts.

Step 4: Select a Finish That Fits the Room

Once the practical dimensions are clear, consider appearance. Timber-effect slats can introduce warmth and vertical rhythm. Fabric-covered treatments can create a softer look. Dark finishes may establish contrast, while pale finishes can blend more quietly with surrounding walls.

Look at the room as a whole rather than treating the wall as an isolated design element. Flooring, cabinetry, doors, furniture, and lighting already establish colours and textures. A feature wall generally feels more integrated when it responds to some of these existing elements.

Step 5: Plan How Much Coverage You Need

More coverage does not automatically produce a better room. Excessive absorption can make some spaces feel acoustically dull, while too little treatment may leave obvious reflections unchanged.

OSHA explains that sound-absorbing materials reduce the buildup of sound in a reverberant field, especially in spaces with hard surfaces. Their effectiveness also varies with factors such as material type, thickness, density, and sound frequency.

This is why panel coverage should be based on the room’s needs rather than appearance alone. A living room with rugs, curtains, and upholstered furniture may require a different approach from an open office with glass, concrete, and hard flooring.

Step 6: Coordinate Panels With Furniture and Technology

Now map out everything that will sit against or attach to the finished wall. A television may need a mounting bracket and cable route. A console could cover the bottom section. Sockets and switches need to remain usable, while wall lights may require precise openings.

Think about furniture dimensions before fixing the final panel layout. A centred design can look unbalanced if a large sofa, television, or cabinet later sits noticeably off-centre. Taking a broader approach to energy-aware interior planning can also help ensure that wall treatments, furniture, lighting, and other room features are considered together rather than as separate design decisions.

Lighting deserves similar attention. Wall washers and directional lights can emphasise panel texture, but their cables, mounting points, and clearances should be considered before installation begins. Planning these elements together reduces the need to cut or modify finished sections later.

Step 7: Check the Installation Plan Before Starting

Review the entire wall once more before installation. Confirm dimensions, panel orientation, edge details, socket positions, television brackets, lighting points, and furniture clearances. Also check the manufacturer’s installation requirements, since fixing methods vary between panel systems.

If the project involves moving electrical fittings, installing new wiring, or altering permanent building services, the relevant work should be handled by appropriately qualified tradespeople.

Plan for Both Appearance and Acoustics

An acoustic feature wall works best when visual design and room acoustics are considered together. Start with the surfaces that already shape the room’s sound. Then choose the wall, measure carefully, decide how much coverage makes sense, and coordinate the design with furniture and fixed services.

Most importantly, set realistic expectations. Wall treatments can help control reflections and reverberation, but sound absorption and sound isolation solve different problems. The Acoustical Society of America notes that materials that absorb sound well are not necessarily effective sound barriers. If the goal is to stop significant noise passing through a wall, a broader sound-isolation strategy may be needed.

Planning around that distinction makes the finished feature wall more purposeful. It can introduce texture and visual interest while addressing the acoustic conditions of the room, without expecting a decorative treatment to perform a job it was never designed to do.

Posted by Deacon Aureole in Interior Design